Rewire Old Fresnels

Binski99

Member
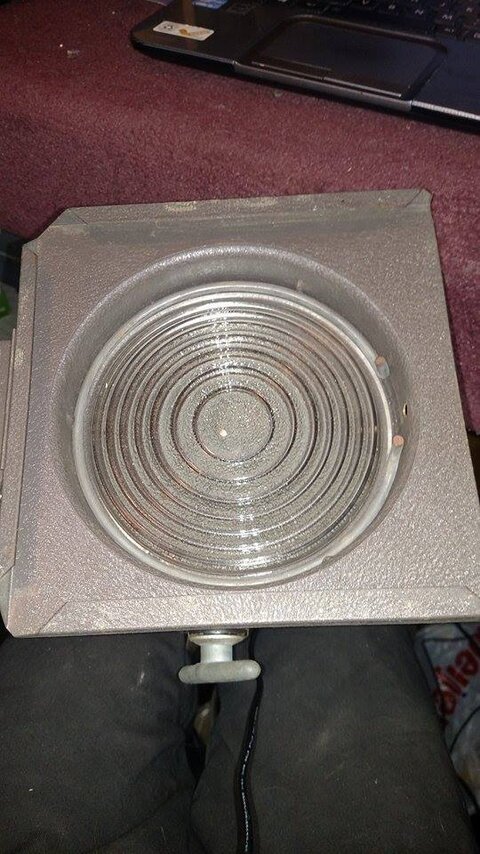
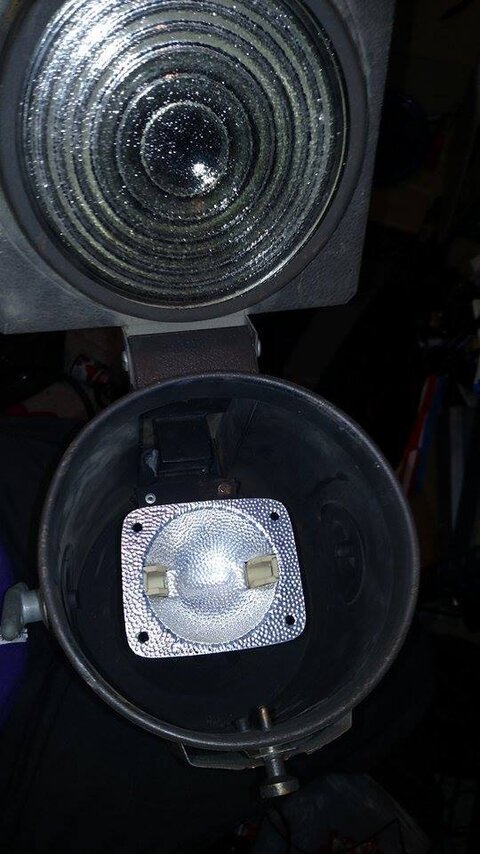
My school has some old fresnels that take a halogen lamp.

The lamp looks like this:Picture

The lamp is about 2.5 inches long. They need to be rewired because whoever tried to do it the first time was not very successful because we about 6 of them that don't work. I think we have one that does. It also looks like they cut the original wire down to about an inch and then used butt splices to connect the wires. They also used what looks to be 12/3 lighting extension cords instead of buying a set of wires for them. It also appears that they made their own ground because they just soldered it on the the inside of the fixture.

My question is are they even worth rewiring or should we just replace them? I am assuming we would have to get new lamp bases, but I have never seen that type of lamp base available for sale anywhere.

Sorry I don't have any pics of the lights I cant get into the school until August.
 
Last edited:
These seemigly by your description are Kliegl or Major origional quartz lamp Fresnes which are very much 1964 in development and a side branch onto what's currently on the market given halogen lamps instead of going dual ended by way of new technology, simply upgraded the older lamps.

They are a side branch to lighting history. I have one, had to invent my own base to one in making it how I think it was done for the museum.

Maximum wattage is 400w and given a linear filament, they are not worth keeping as is. Plus the RSC type of base is very prone to wearing out faster than other bases. They were an interesting development but are not worth keeping as how they are.

Two ways to go with them (this given I already have one), the first is resale value as per a 1964 Kliegl quartz light Fresnel that has that somewhat rare RSC base to it. As an antique you might make say $20.00 thru $40.00 range each for them if you space them out some. Together they are worth less. The other way to go with them is in upgrading them to #36Q standards by way of buying the Altman lampholder/reflector assembly as per something really easy to upgrade the fixture to and will work better.

Did that in the 90's and was foolish enough to toss out my mounting gear for such a thing. Had to invent such mounting gear yeas later in bringing it back to what was origional and an important concept for lights. 36Q upgrades work fine for these fixtures and is certainly cheaper than buying new. Same lenses etc. thus given it's cheaper to replace, cheaper to keep them.

Side note, should you replace these fixtures for base to the more modern and standard base/reflector assembly, I ask you send me one of the replaced ones so I might use it on one of mine.

Otherwise, yes replace the fixtures and sell them off as per the brand and as 1964 - see the Kliegl Brother's website for the info on such a Fresnel. Interesting fixtures, not very efficient but a definate statement on technology during the period. For stage lighting in current use... mostly in my opinion crap. If you have to use them fine but probably also asbestos, this much less not very efficient. Such Fresnels are history only and not much use for efficient lighting. Pull up the Kliegl article on themand sell them off as per what they are in being antique.
After that, easy enough to upgrade to 36Q standards for a Fresne.

Interesting fixtures, what ever the case, if at all possible contact me off - line in that I have one I invented a base to which I would like to make real.
 
Thanks for the info ship.

I looked on google and the lights we have like these:

proxy.php


I will have to talk it over with the drama director because I am just a student. I would have no problem shipping you one if the director says it is fine, but like I said they don't work so it may need work to get working. We will probably keep the working one. I will probably see if it is in our budget to get some new lights.

We are doing the musical Urinetown and from what I was told it is one of those shows where the lighting will make it or break it. It is also supposed to be fairly complex at least compared to what we usually do. Thats why I need to get as many working fixtures as I can and as many working dimmers. I want to get everything fixed over the summer even though the musical is not till spring. I will get some pics of them up the first week of August.

Thanks for your help!!!
 
proxy.php
proxy.php
this is the exact fixture he was talking about

a.jpg ab.jpg sorry the link didnt show up. i will get a picure of the lamp uploaded mondaay or tuesday
 
Last edited by a moderator:
We have a vast forest of very similar lights, some going clear back to the 1930s. Ours were all ether purchased with Med PF (medium prefocus) bulb sockets or have been converted to such. We usually lamp them at 500W with a BTL type bulb. They are not terribly efficient, but they are frequently what is available and with proper theatrical LED fresnels running in the 1 to 2 kilobuck apiece category and given typical school budget pressures, there is a real good chance that you will be stuck with these for now. Check the bulbs first before blaming the wiring, there is a real good chance that the bulbs are blown. No joy? check the socket too. If you can see burnt and/or blackened contacts in there you will need a new base. These too are still available from several vendors (Out here we use PNTA a lot) but it will take a bit of time and savvy to install. Broken filaments are not always easily seen. Replacements bulbs run $20 to $30 apiece. A well run organization will usually have spares on hand. Bulbs on the cooler end (2900K or so) can last up to 2000 hrs so they won't need to be changed too horribly often. They will, however, get really ambery towards end of life which can make matching fixtures a B####. If the external wires have white fuzzy frayed non-woven insulation then there is a fair chance you are looking at some asbestos wire. Replace that stuff with some high temperature fixture wire and dispose of the old stuff properly. The lungs you save may be your own.

Can they be used/saved? Definitely. But it will be a labor of love to get them fit. In the long run new fixtures are the way to go, but with prices what they are you will probably only be able to afford to replace a handful of old fixtures at a time. Finally: When the end of the road is reached and the replacements are in, it is perfectly possible to put a medium screw base (aka edison base) in there with a 60W or even LED bulb and use these as a decorative fixtures with a highly recognizable theatrical flair. Real good for 'in appreciation' and 'best tech' type awards (again, some savvy and elbow grease required).
The wiring is corroded
 
The wiring is corroded
That's not good, but hardly fatal and probably to be expected if plain old extension cord was used in the last rewire. As you have probably noticed, these things run hot. Replace with high temperature fixture wire (150 degree C min. 200 degree C rated is better if you can get it. Teflon insulation is good, but I like to back that up with silicon coated glass sleeving where it passes through the fixture [Teflon can cold flow and will do so quicker at higher temperatures]). The sleeving also adds some abrasion resistance. If crimping and splicing inside the fixture use high temp non-insulated crimps. These are actually sold in many hardware stores for redoing connections in ovens (If the hardware store sells electric burner elements for stoves and ovens, there is a good chance they will carry high temp lugs, splices, fastons, etc.
 
That's not good, but hardly fatal and probably to be expected if plain old extension cord was used in the last rewire. As you have probably noticed, these things run hot. Replace with high temperature fixture wire (150 degree C min. 200 degree C rated is better if you can get it. Teflon insulation is good, but I like to back that up with silicon coated glass sleeving where it passes through the fixture [Teflon can cold flow and will do so quicker at higher temperatures]). The sleeving also adds some abrasion resistance. If crimping and splicing inside the fixture use high temp non-insulated crimps. These are actually sold in many hardware stores for redoing connections in ovens (If the hardware store sells electric burner elements for stoves and ovens, there is a good chance they will carry high temp lugs, splices, fastons, etc.

I second the fiberglass coated advantages. Often I will use 200c wire for the conductors and 150c Teflon non-coated for the ground. This way when servicing the fixture if I see the insulation over the ground is deteriorating I know it's been overheating. (In addition to the step of looking at the contacts of the bad lamp as it's replaced to get an indication of if the lamp has charring to it's base, the socket will also so it should not be re-lamped but instead pulled from service to service.) This ground wire insulation damage possibly from a bad socket or connection. Any theatrical supplier will stock SF-2 the 200c sleeving in black and white, the black #0 size fiberglass over sleeving, and many will also stock the Type K or FEP 150c heat wire. Might also stock the high temperature terminals. The Altman assembly check with your theatrical supplier but I believe comes with the wiring already installed. Given your fixtures are RSC/R-7s dual ended, you do not need to buy one each black and white unless doing Europe on tour. Can both be either black or more properly white.

On the crimp barrel of the high temp. ring terminal install three wraps of 3M Scotch #27 or 69 high temperature fiberglass electrical tape. I normally use 1/2" wide but 3/4" will also work. (McMaster Carr or Grainger for terminals and tape amongst other sources) This will help protect aganst the barrel of the ring terminal shorting to anything and prevent the fiberglass insulation from un-braiding at the terminal. If the fixture has a two screw clamp style cord grip instead of a plastic heyco style cord grip, a few layers of fiberglass electrical tape 1" - 1.1/2" wide here is also really useful in preventing the fixture cord from wearing out.

(By the way if Heyco style cord grip in use, thought everyone knew, but there is a installation/removal tool for such cord grips. The old one is normally shot but replacements are cheap. Having the tool is much simpler in somewhat easy to deal with for properly installing such a cord grip.)

At the cord grip, I normally wrap the three conductors with the heat tape to band them together and without cutting it slide the fiberglass over sleeving over this wrap of tape. I now wrap the fiberglass sleeving a few layers thick down about an inch and a half or so and cut the tape always at the top so it's end winds up under the clamp. The tighter weave on the tape and added thickness prevents bending the cord too close at the strain relief and from the cord grip cutting into it. It also prevents the fiberglass oversleeving from pulling out of the cord grip.

Figure out what size screw is in use at the termination to contact - normally a #6 in general, but on this dual ended socket could be a #4 if not crimped termination not removable. (Details if that's the case.) The screw should at least be able to come out as opposed to many P-28s lamp sockets that won't allow the screw to come out. If you need to use liquid wrench but be sure to clean away with soap or degreaser any oil used to get the screw out. You need to know what size stud or screw is in use before buying your ring terminal. A #6 will work if you can't get a #4 for high temperature, but isn't optimum.

Do a brass wire weel on a Dremmel tool to the contact area, you can also re-surface the ball of the lamp terminal with this wire wheel. You need to remove any corrosion and get back to fresh bright contacts. A silicone abrasive polishing wheel for the Dremmel will work better for this bright work purpose but it's a McMaster Carr order part not otherwise in stores. Can furnish part numbers on request. Brass wire wheels will otherwise for the most part work fine and are available from anyone that sells Dremel tools. Once you have fresh bright work you need to treat it or it will begin to oxidize again. Many recommend Craig's De-Oxite, especially the copper infused version (available on line) I have never tried it. I use Electrical Contact Cleaner w. Lubericant 16oz. Spray McMaster #7437k15 on up to 5Kw Fresnels.

If the fixture isn't grounded, a good time to do it and easy enough but another discussion.

Once the brightwork is done, re-tap the threaded connection holes dry - do not use cutting oil and either also re-tap the screws or it's normally better to just replace the screws with new brass ones. Add a silicone coated bronze internal tooth lock washer between the screw and the ring terminal. (Same sources on screws and lock washers.) This will help prevent the ring terminal from loosening as the wire moves during focus. If the contact area under the ring terminal is pitted or isn't coming bright after cleaning, add another lock washer under the ring terminal and it should help with contact.

High temperature ring terminals are made of harder metal than standard crimp terminals, I have even broken crimp tools with them. You are best going to an electrical supply store and getting what's industry called a "Stakon tool" It is a crimp tool designed for crimping terminals - not some "multi tool" that has weak mechanical advantage in crimping pressure and normally just crushes over a small surface area. Goal is to displace material not to smash and let the wire settle with expansion and contraction into a loose crimp contact. I buy the Klien #1005 and #1006 and recommend them. 1005 for 14-16ga wire, 1006 for the others. Ideal #30-425 while it works really well on insulated terminals, doesn't as well for these smaller gauges non-insulated. I often prefer this tool for 12ga thru 6ga crimps insulated or not. Remember to put the saddle in the seam. In other words it would be a bad crimp if the seam of the crimp had the jaw (tooth) of the crimp tool go into the seam of the crimp terminal. Always leave your crimp tool on the terminal after crimping and tug hard on the wire with it after crimping for the initial crimps. Frequently on a crimp terminal it is thought tight enough but not in causing problems down the road or wrong place crimped on an insulated terminal, or perhaps the wire pulled free while crimping- I even do this after 20 years+. if the experienced people do and teach, others will follow in getting proper crimps as a constant failure problem in addition to the wrong crimp tool used.

On the wire and crimp terminals (finally), 18ga heat wire will work but a good standard to use is 16ga wire for anything under 1Kw. It will work better in the strain relief, less chance of breaking from wear, and deal with current issues from heat resistance later better. That said for the ring terminals, you will find that a 18-22ga ring terminal will normally fit better on a 16ga wire than a 14-16ga wire terminal. Use them unless your heat wire is 56 strand. Normal SF-2 wire has 19 strands of wire to the conductor, the more flexible 56 strand wire will be larger and need the larger ring terminal. Heat wire at 150c or 200c are different than normal jumper 90c or 105c cable in that at higher temperatures it can be a little less in actual size. 2,000w Fresnels wired with 14ga wire for instance don't seem correct but is. General rule is when buying wire know also the stranding of it. No problem either way but different terminals to be used.

Send more phototos and how you are doing type stuff in us all living vicariously thru your project. Wish I could give more classes and train more in detail.
 

Users who are viewing this thread

Back