Advice needed to paint realistic wooden floorboards

Sitbon

Member
Hello people

I'm looking for advice, weblinks, resources to help me approach painting a large stage a faux woodgrain to look like floorboards. I have a graining tool but apart from that no idea where to start to make the job easier.

The set is set in an old church hall so ideally looking for colour recipies for a simple base and top coat colour. The floor is currently black so would appreciate some advice about the easiest and quickest way to get the job done. I was thinking of going over the floor in a mix of white/yellow oche for the base then apply raw sienna using a wood graining tool over the top. Possibly a third darker brown coat e.g. burnt umber. I will be using scenic paints specifically so advice with respect to traditional paint colours appreciated.

Also, what is the simpliest way to paint floorboard lines? And do floorboards generally run upstage/downstage or SR to SL?

thanks

Andrew
 
Personally I hate gaining tools. What you're asking for really is in any scenic painting book and some of the basics too. For lining I'd use a lining tool and brush on a bamboo stick.


Sent from my iPod touch using Tapatalk
 
It all kind of depends on what effect you're looking for, how important it is to the show, and how much time you're interested in devoting to it. If the floor will be barely visible to the audience (sightlines and/or elevations) then you might not be as concerned as you would if the floor was a more prominent feature. As for direction, I've seen stages planked in both directions (once or twice even within the same stage), but since you're just painting for a set, you can do whatever makes sense for the show, L/R, U/D, angled, etc. In fact, you could even use the floor lines to help with forced perspective, if the set would benefit from that.

I'd start with a tan-ish or beige-y base coat, some thin small-area washes of reddish, brownish, and dark brownish wood colors to break up the base color, dry brush some off-white grain lines to give some highlight, then some nearly black grain lines, and then finally line the planks with a lining stick. Try some small areas first, and if you don't like it, re-base coat and try again. Sometimes painted wooden floors don't look right until they've been clear-coated.

A lining stick is just a short 1x3 board 4' to 6' long, with two edges of a wide side beveled and a handle attached to the middle. It's built with the bevels down, and you then have a straight edge to guide a thin brush with a long extension handle along. The bevel helps prevent excess paint from dribbling down the lining stick and smearing on the scenery (tipping the lining board can also help, but can make controlling the brush harder. The handles on the stick and brush allow you to paint the floor from a standing position, much easier on the knees. If painting the lines isn't working for you, big black felt tip markers can be an option.

Any decent scenic painting textbook will cover wood graining, and there's also faux-finish architectural/crafter books and sites out there.

Make a mess and have fun - other than trying to mix oil-based and water-based paints together, there aren't any wrong answers in scenic painting, just unlovely ones.
 
I don't know that there really is 'A' single recipe. there are so many different species of wood and so many different conditions that one might want to portray. The best advice it to simply play with it. Do a base coat, preferably thinned lighter colors, a wash really, then after drying you can procede an a couple of different ways; 1 would be to use a 'Dry-Brush' technicque with a finger brush or a homae made graining brush. You could also use one of those graining tools but they are not my favorite. You could also use sharpie or other fine tipped permanent marker and draw lots of grain lines then do your graining technicqie over that. Or you could do something that I learned last year which was to base, then grain, then use a liner board and a sharpie to add the outlines of each board. THEN come back over the of everything with a slightly tinted clear acrylic < like Roscos clear satin glaze>. Brush on the glaze then immediatly come over it with a graining tool. . this will impart a grin to the clear finish which will dry a little raised above the surface of the paint. It looks fabulous under light. whatever technicque you use besure to seal it with another coat of clear satin, of gloss glaze, depending on what you want your final look to be...

Oh, as far as Direction goesit's really what every the designer calls for. I'd say the preponderance of stages I've worked on have the boards running US-DS, but sometimes that is only the lower half of the stage they hit mid stage and th grain changes to L-R.
 
Here's my hardwood floor technique when budget and time are toward the "quick and dirty":

1) base in a tan color
2) drybrush dark grain lines
3) I make about 3 glazes of different colors, depending on the tones I want the floor to be. Often a brown, a more reddish color and a more greenish color. These are paint mixed with clear acrylic, which makes the pigment clump up a bit and keeps the brush stroke visible. I dip one, and apply in the direction of the grain, in stripes about the width of the "boards." Then dip another color and paint more boards. It OK if they mix and blend a bit.
4) Lining is optional. Without, you still evoke a wood floor, and the differences in color suggest individual boards. Lining adds realism. A paint pen can speed this process.
5) clear sealer

This is not a fully realistic floor, but gets you 85% of the way there in 40% of the time.

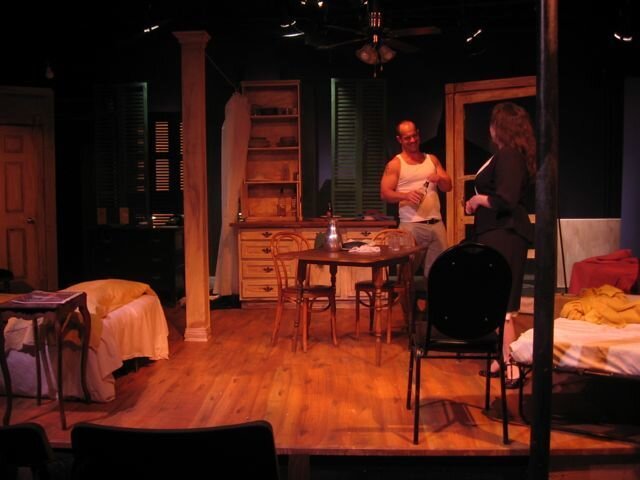
I think I did this floor on a small stage in about 6 hours.

Streetcar Floor.jpg
 
Beautiful floor Nicholas !
 
Here's my hardwood floor technique when budget and time are toward the "quick and dirty":

1) base in a tan color
2) drybrush dark grain lines
3) I make about 3 glazes of different colors, depending on the tones I want the floor to be. Often a brown, a more reddish color and a more greenish color. These are paint mixed with clear acrylic, which makes the pigment clump up a bit and keeps the brush stroke visible. I dip one, and apply in the direction of the grain, in stripes about the width of the "boards." Then dip another color and paint more boards. It OK if they mix and blend a bit.
4) Lining is optional. Without, you still evoke a wood floor, and the differences in color suggest individual boards. Lining adds realism. A paint pen can speed this process.
5) clear sealer

This is not a fully realistic floor, but gets you 85% of the way there in 40% of the time.

I think I did this floor on a small stage in about 6 hours.

Thanks for the concise response Nicholas. Can you clarify what the clear acrylic is in terms of brand so I can look it up and its purpose. Is it a binder? Is it something you get from a standard paint store or specialty scenic design store?

thanks Andrew
 
Last edited by a moderator:
My favorite is Rosco brand clear acrylic. I think other water-based clear sealers would work, but I find the Rosco does a great job in getting the pigment to "streak" and get that grainy look. Others tend to make it blend more and get too uniform.

I'll clarify, too. Step #2 is really just taking a dry 3-4" brush, (if you have one that's a bit crunchy, even better) picking up a VERY small amount of black paint and lightly dragging it across the floor. I'm not painting in any individual lines.
 
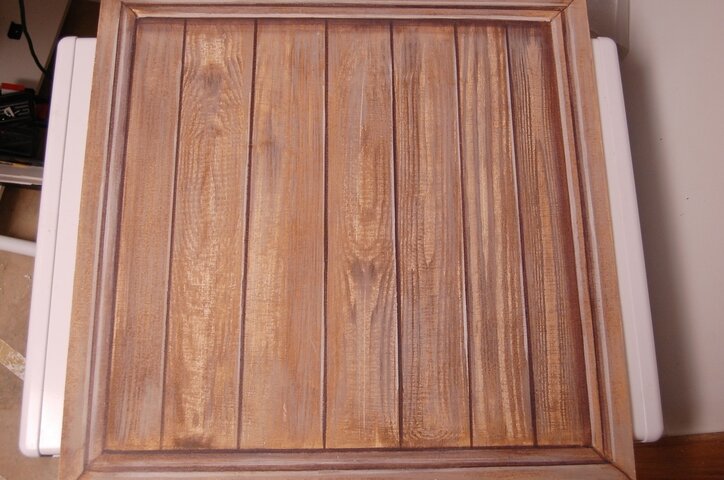
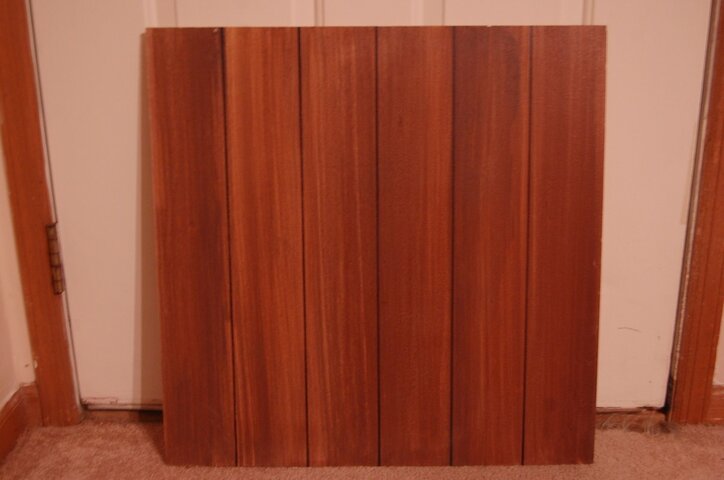
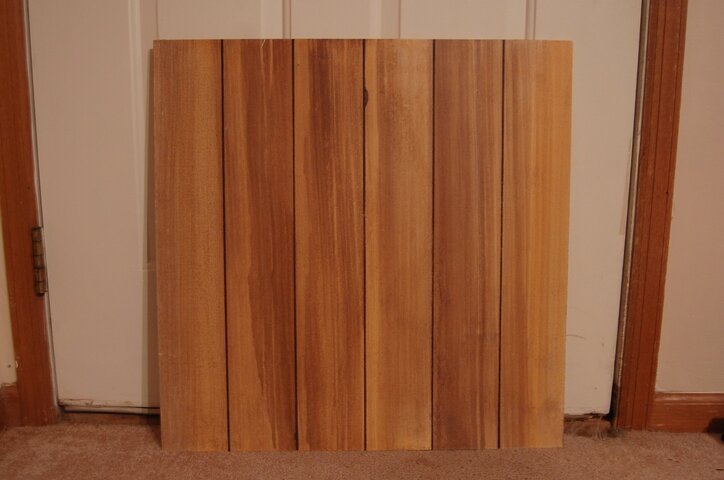
Realistic wood grain for a floor is time consuming and unless you have the time or crew to help, I wouldn't recommend it. However, if you do have the time this is how I approach a realistic floor. I start from the lightest color and move to the darkest to help create depth and richness. For the floor sample below:

1) Mix Burnt Sienna and white to make a light golden color for the base.
2) Snap floorboards with a chalk line and go over with a sharpie.
3) Mix Burnt Sienna and Raw Sienna to make an orange. Make a wash 1:2 of paint to water then brush wash over individual floor boards. Using the graining tool, drag through the wash. I usually have a rag with me to clean the tool after each drag. Let it dry completely. It also helps to add sealant to the wash to keep each step separate. Washes can reactivate existing coats causing colors to mix instead of layer one on top of the other.
4) Mix a wash of Burnt Umber 1:2 and repeat step 2 doing your best to repeat the grain pattern.
5) Mix a grey wash 1:2 selectively painting each floor board using a chip brush to create the grain or using the graining tool. You don't want to go over the whole floor board if you are creating a slightly aged look.
6) Paint over sharpie lines with Burnt Umber
7) Paint highlight line with a mix of Burnt Umber and white
8) Seal with Rosco Sealant

DSC_3455.JPG

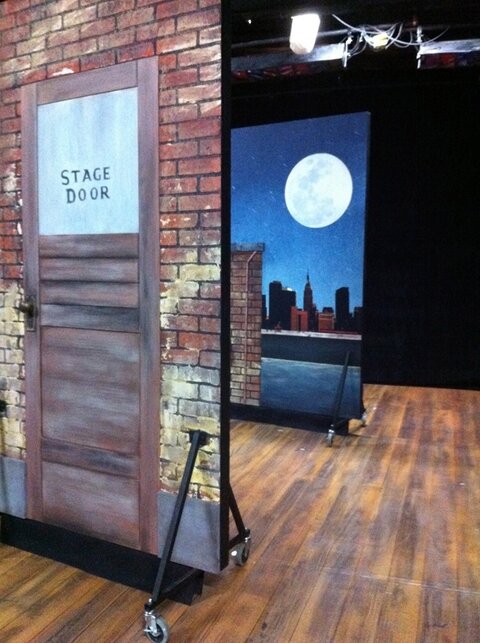
Musicals Suck.jpg

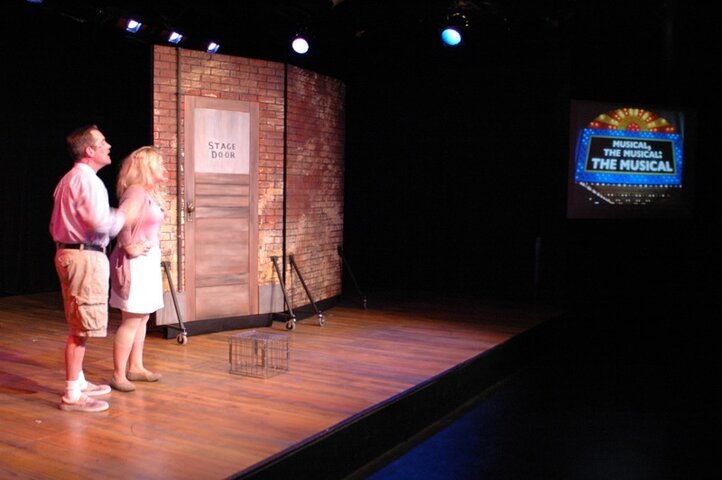
Musicals Suck3.jpg


Realistic wooden floors are for the most part about color and I paint most of my floors using a chip brush, or the 7 dollar color washing brush you can buy at Lowe's. This is a quicker alternative to using the graining tool.

1) Mix base coat, usually beige of either a yellow or orange base depending on the type of floor your painting.
2) Mix a wash 1:2 of either Yellow Ochre if the base coat leans toward yellow or a wash of Yellow Ochre or Raw Sienna mixed with Burnt Sienna if the base coat leans toward orange. Paint the floor in the direction you wish the grain to go. You'll want a clean bucket of water to dip your paint brush in to dilute your wash further as you paint to create variation in the wood grain, so that in some spots the base coat comes through more than others.
3) Repeat step 2 with the next darkest color; Raw Sienna for the yellow based floor, or Burnt Sienna for the orange. Again use water to help add variation and allow the other colors to peak through.
4) Snap floorboards using a chalk line and go over with sharpie.
5) Mix the last wash of Burnt Umber 1:2. This is the grain color which is used with varying degrees of dilution to create the grain. It is also done one floorboard at a time and is the most time consuming step. With this step you want to drag the brush, leaving the brush marks. I use the just the tip of the brush if I want the grain to be distinctive lines or I will drag the brush lifting one side or the other letting the grain drift and fade so all the floorboards don't look the same.
6) Seal with Rosco Sealant.

DSC_3459.JPG

DSC_3462.JPG
 
Second that! Great job on that floor!!!
 
if you start with a mid to light brown color painted on the whole floor you can then take a push broom or any kind of broom and use it as a dry brush. Use black paint, pour some onto a piece of ply, then dip the end of the broom in and dry brush the whole stage. in addition to dry brushing wiht black you could use a muddy white to give the floor a little more texture.
 
Okugi

Thanks for this. Extremely helpful, especially the step by step recipies. In the second picture with the two flats are the faded areas straight umber? The designer has clarified he wants faded floor boards. In this case would you still use a coloured yellowish base or just plain white for those 'faded' areas? I was thinking that those areas where there are large traffic areas, especially near door entries would be slightly faded with little colour.

Where are you based in the world?

Thanks

Andrew

I am glad I could help and I am based in the state of Georgia in the USA.

As for the photo with the two flats, the areas that have the umber grain also have a warm grey wash over them. For a faded floor I would start with a light base, you still want yellow ochre in the base because unless it's outside, you wouldn't be looking for sun bleach floor boards. I believe for that floor I added a little burnt umber to the base to cut the brightness in the yellow ochre and white. When I brush the washes over the base, the areas I want to look faded I use water to help dilute the color, sometimes to the point where I am putting almost no color in those areas, so they are less saturate.
 
Katina

Again thanks. Whilst asking about the floor I've forgotten to ask about the walls. Following the designers instructions I painted tongue and groove pannels using a sharpie with a colour selected by the designer which was a light lemon yellow. I arrived at the theatre last night and was told the director wants the wall colour darker. Nothing specific mind you, just darker. Mmmmm. Anyway I glazed the panels I painted with yellow oche quite watered down. Would appreciate you advice about the next layer as he doesn't want the walls to be timber but timber to show underneath paint. To be honest given the time involved I don't want to spend time making the walls look like timber only to paint over them in a more opaque whitish yellow colour. But then again perhaps there is no simple way of simulating wood under painted.

Are there any shortcuts you can recommend? Again I've only toned the pannelling on the wall using oche, darker on one side away from the light. Already they are looking quite yellow so will have to tone back so the walls don't look like straight wood. Will try to take some photos over the weekend to post.

Thanks

Andrew
 
Hey Andrew,

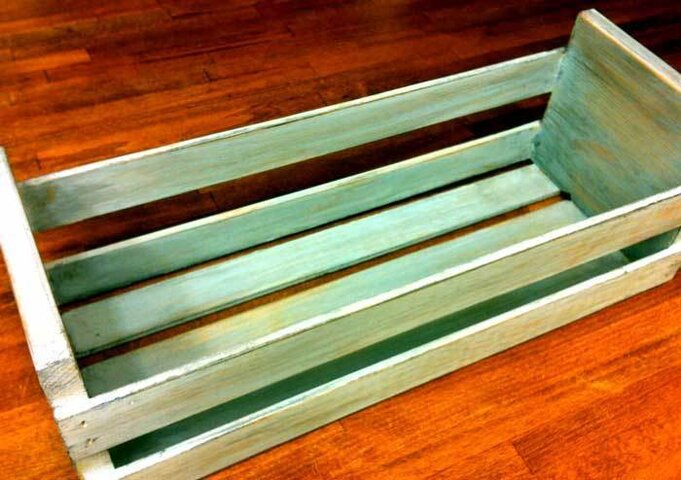
I want to make sure I understand the look you are trying to accomplish. A picture would help of what it currently looks like. You are trying to paint wooden wall paneling, with a peeled or faded painted finish on top? Unfortunately, you will need to paint a full wood finish in order for the whole paint treatment to read the way the designer/director wants. Since you already have an ochre wash on the walls, follow up with a burnt umber wash the same saturation as the ochre to tone down the yellow and help finish out the faux wood. After that, you can do a dry brush with a fairly opaque glaze of your top color. I don't have a sample of my own to show you but here is a good picture. crate-update3.jpg I would recommend using a chip brush.
 
I agree that cheap chip brushes are great for dry brushing. The junky bristles give a nice grain texture. Especially if you're going for quick and dirty.


Sent from my iPad using Tapatalk
 

Users who are viewing this thread

Back