I just finished building my rose and I'm so happy with how it turned out. I started out with a base someone else built for another production of Beast. The base is hollow and has a piece of Coroplast on top to allow you to put a light fixture inside and shine it up into the flower. I couldn't find a decent sized "bell jar" to cover the Rose with so I went with a decorative candle/lantern thing. Cost me $30 at Pier 1 Imports. I had to cut the bottom out of it with cutoff wheels on my Dremel, so that light would shine up through it.

I used the same basic design as "Yourbeekeeper" did in the Youtube video above. I tried to do the multiple layers of caps with the stop in the middle like he did in the video so that the wires don't pull through when you pull them. But he never really showed what he did and I didn't really have the tools or time to figure it out. I tried putting solder on my wire to act as stops but when I attached the outer cap the solder melted off and plugged the whole thing up. I took it back apart and simplified to just the 3/8" OD soft copper tubing shaft with a 1/4" ID cap. Drilled holes in the cap and didn't permanently attach it. Just shoved on for a nice snug fit (the fact that it had been soldered on and then removed probably helps make that fit really nice and tight. It'll take a little longer to reset between shows but not a big deal. I ran 20 gauge wire up the tube. This is what the top looks like with my design.
I tore apart a $3 silk rose. Wrapped the tubing and cap in floral tape, used the floral tape to attach the branches and leaves from the silk rose, then used the same red 12 gauge solid strand coper wire trick "YourBeeKeeper" used in the youtube video as the stem. Did you know there's a little foam "bud" at the center of a silk rose? I decided to leave it intact so my last "leaf" to fall will be the core bud of the flower. It really makes the rest of the petals form into a beautiful flower. Here's the reconstructed flower close up. I had a really hard time getting all the chinese hot glue off of the petals as I was taking it apart. It shows close up, but not at a distance and the first row will be about 30' from my rose, so I'm not worried.
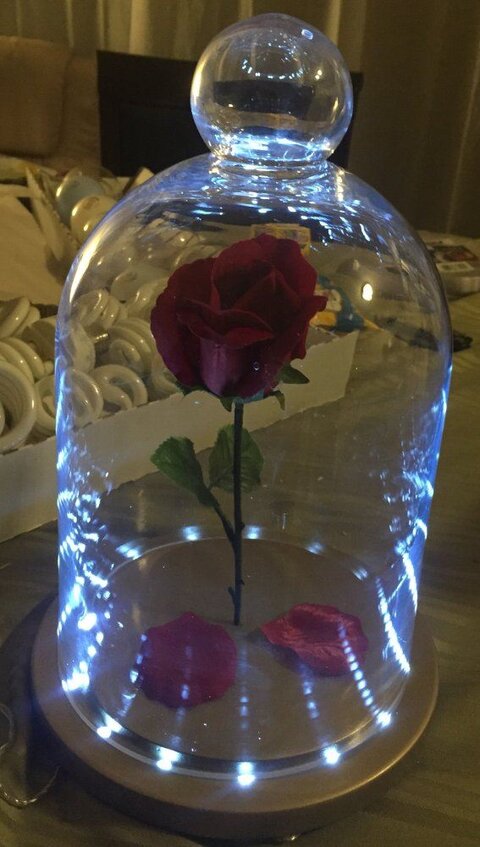
Finally here it all is in the stand. When I get the paint touched up and get it in the theater with the light on I'll shoot a video of how it looks when it's working.

I used the same basic design as "Yourbeekeeper" did in the Youtube video above. I tried to do the multiple layers of caps with the stop in the middle like he did in the video so that the wires don't pull through when you pull them. But he never really showed what he did and I didn't really have the tools or time to figure it out. I tried putting solder on my wire to act as stops but when I attached the outer cap the solder melted off and plugged the whole thing up. I took it back apart and simplified to just the 3/8" OD soft copper tubing shaft with a 1/4" ID cap. Drilled holes in the cap and didn't permanently attach it. Just shoved on for a nice snug fit (the fact that it had been soldered on and then removed probably helps make that fit really nice and tight. It'll take a little longer to reset between shows but not a big deal. I ran 20 gauge wire up the tube. This is what the top looks like with my design.

I tore apart a $3 silk rose. Wrapped the tubing and cap in floral tape, used the floral tape to attach the branches and leaves from the silk rose, then used the same red 12 gauge solid strand coper wire trick "YourBeeKeeper" used in the youtube video as the stem. Did you know there's a little foam "bud" at the center of a silk rose? I decided to leave it intact so my last "leaf" to fall will be the core bud of the flower. It really makes the rest of the petals form into a beautiful flower. Here's the reconstructed flower close up. I had a really hard time getting all the chinese hot glue off of the petals as I was taking it apart. It shows close up, but not at a distance and the first row will be about 30' from my rose, so I'm not worried.

Finally here it all is in the stand. When I get the paint touched up and get it in the theater with the light on I'll shoot a video of how it looks when it's working.