
You are using an out of date browser. It may not display this or other websites correctly.
You should upgrade or use an alternative browser.
You should upgrade or use an alternative browser.
Disassembling Clearcom Headset
- Thread starterDavidDaMonkey
- Start date
PIcture links aren't working.
Often there is a sticker / label on the outside < away from the head> of where the mic boom swivel is. Several models have a screw hidden under this aluminized sticker you have to either remove it or poke through it with a screw driver. this is often where wire get bound up and broken as well.
A lot of headset models require that you remove the padding around the ear piece, that will either reveal a seam which you can pry open < standard modern plastic component disassembly stuff, tabs and ridges.>
Very rarely do the mic elements themselves go bad it's typically the wiring where it runs through the case of the ear piece down into the mic boom.
DavidDaMonkey
Active Member
Yeah I already fixed two of our Telex ones and the problem was at the swivel. I've checked the easy to locate connectors, but unfortunately those are all fine. I'll try to get the pictures up in a way that works better because I can't seem to find any labels or hidden screws, and I've pulled and pried and pried and pulled and can't seem to pop the seam apart.

Last edited:
Oh ! That kind!
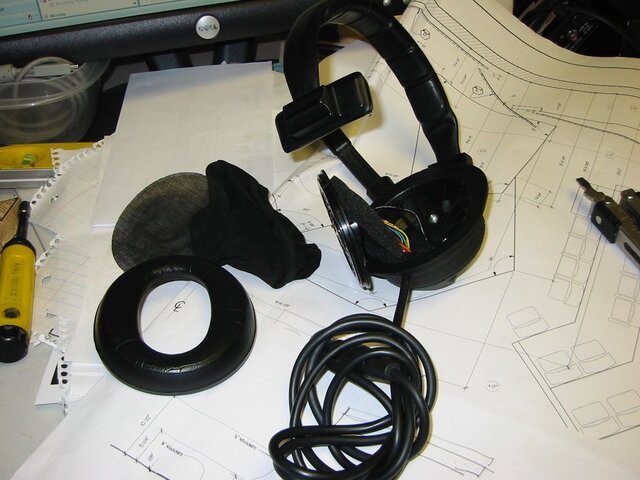
I just took one apart, here it is on my desk.
Pull the fabric cover off. Pull the plastic pad off. place a screwdriver in the seam around the speaker. Speaker is hard plastic the rest of the assembly is ductile. Pry the speaker out of the softer plastic when done just pop it back in.
I just took one apart, here it is on my desk.
Pull the fabric cover off. Pull the plastic pad off. place a screwdriver in the seam around the speaker. Speaker is hard plastic the rest of the assembly is ductile. Pry the speaker out of the softer plastic when done just pop it back in.
Attachments
DavidDaMonkey
Active Member
Oh ! That kind!
I just took one apart, here it is on my desk.
Pull the fabric cover off. Pull the plastic pad off. place a screwdriver in the seam around the speaker. Speaker is hard plastic the rest of the assembly is ductile. Pry the speaker out of the softer plastic when done just pop it back in.
Ahhhh I see now. I was trying to pry at the wrong part. We are about to open the house, but I'll give it a try tomorrow any let you know the results.
By the way, thanks for helping here.
Last edited:
......By the way, thanks for helping here.
Aw, Shucks Ma'am.
Jez doin' ma job.
DavidDaMonkey
Active Member
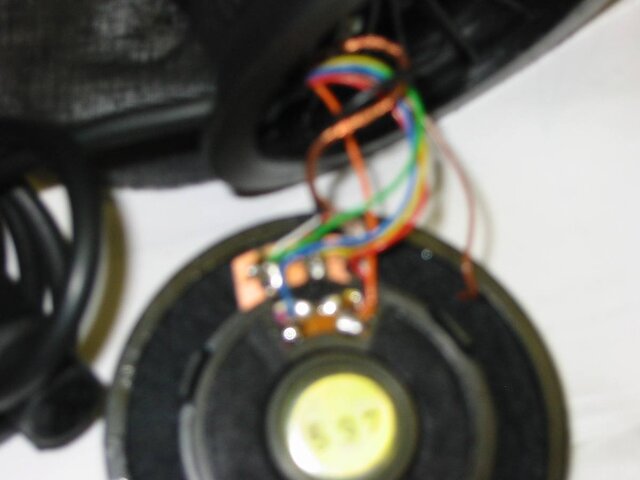
Is that one still disassembled? Can you show me a picture of where the wires attach to the back of the speaker? I have two that are no longer attached, which might explain my problem
Specifically, the yellow and blue are the two in question. I'm guessing from where the solder is that they go in between the red and brown wire, but I'm not sure and I'm not sure in what order.
Specifically, the yellow and blue are the two in question. I'm guessing from where the solder is that they go in between the red and brown wire, but I'm not sure and I'm not sure in what order.
Last edited:
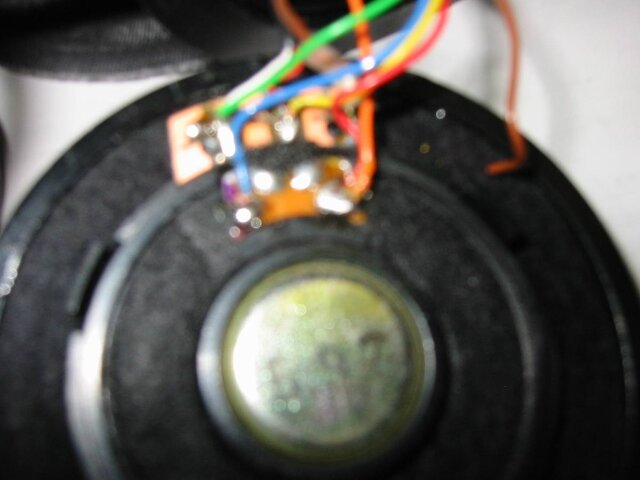
I think these pictures suck, lousy camera, but let's see itf they help.
Looking at the back of the speaker piece I have Blue and brown on the lefthand speaker solder joint, then then red and orange on the right.
On the top three solder joints, leftmost, White and Green. Middle small red < from mic multiwire> and Yellow, right All the bare copper.
Looking at the back of the speaker piece I have Blue and brown on the lefthand speaker solder joint, then then red and orange on the right.
On the top three solder joints, leftmost, White and Green. Middle small red < from mic multiwire> and Yellow, right All the bare copper.
Attachments
DavidDaMonkey
Active Member
Similar threads
- Replies
- 5
- Views
- 1K
- Replies
- 5
- Views
- 720
Users who are viewing this thread
Total: 1 (members: 0, guests: 1)