Old theatre lights CAN be useful.

Of course you should post pictures! That's one of the best things about CB! The pictures!

Attached is a oak box spot with a 3.5Q5 lens and a Inkie reflector/socket assembly. 35w dc bayonet lamp, the asbestos looking padding is McMaster Carr #93285K15. Basically a light straight out of the "Home Built" chapter from Fuch's "Stage Lighting" 1929.

The bunch light is basically the same chapter & the same style of construction except that the heat shield is painted with ceramic white paint.
 

Attachments

  • oak box spot 001.jpg
    oak box spot 001.jpg
    128.8 KB · Views: 718
  • oak box spot 002.jpg
    oak box spot 002.jpg
    141.8 KB · Views: 725
  • bunch light 007.jpg
    bunch light 007.jpg
    105.3 KB · Views: 510
  • bunch light 008.jpg
    bunch light 008.jpg
    189.9 KB · Views: 366
  • bunch light 009.jpg
    bunch light 009.jpg
    163.4 KB · Views: 342
  • bunch light 010.jpg
    bunch light 010.jpg
    206.5 KB · Views: 356
5873d1294879370t-old-theatre-lights-can-useful-bunch-light-010.jpg

One can't help but find humor in the dichotomy of the juxtaposition of the half-coupler on the yoke of an "olivette." What, were you out of Mega-Claws? Couldn't you have whittled yourself up a c-clamp? Where's the wooden safety cable?:rolleyes:

They're beautiful, ship, but as I've said before, I'm not sure I understand their purpose. Still waiting on the maple Source Four.:eh:
 
Last edited:
Okay, the SourceFour™ yoke label DOES say "Not for Residential Use,"...
I remember laughing hard at the same type sticker, the first time I saw it on an 18K fresnel!
Residential use... Yeah Right?
I've used em @ hundreds of residences; we do take them with use when we leave. Never left one for the home owner.
 
Next time my crew asks for more fixtures, I'll flippantly tell them "go carve one out of wood". When they balk, I can tell them "well, Mr. Ship did!" :lol:

All joking aside, those are both neat fixtures! I can see them being used as props on stage or to stand in the lobby as conversation pieces. Would also be a good project for students to build. You could learn a lot about the theory of lenses, reflectors, point sources, and the like when building the fixtures.
 
Time to get out the lathe. I'm gonna turn me a 360Q!

Actually, with all the spare parts I have around (plus an under-used Dremel tool) I've thought more than twice about splitting a 360Q right down the middle. Have the lenses cut at a glass shop, hold them in place with silicone... I've thought it through. I'd chop the reflector, gate -- everything. If nothing else, it would be a cool visual demonstration piece for showing the basic principles of ellipsoidal fixtures.
I could also play that game where I pretend that my stage light has somehow melted itself halfway in to the floor. I just need some dried silver paint to look like a puddle of molten aluminum. Boy, that would never get old.

Beautiful lights Ship! I'll bet those pass the Wife Acceptance Factor!
 
Last edited:
Time to get out the lathe. I'm gonna turn me a 360Q!

Made a 1/4" mistake in re-doubling the math on the box spot - don’t bench focus in already done the spacer and doing it a second time later. Second one will work properly. Fun project and Wifie won’t let it leave the house in liking it.

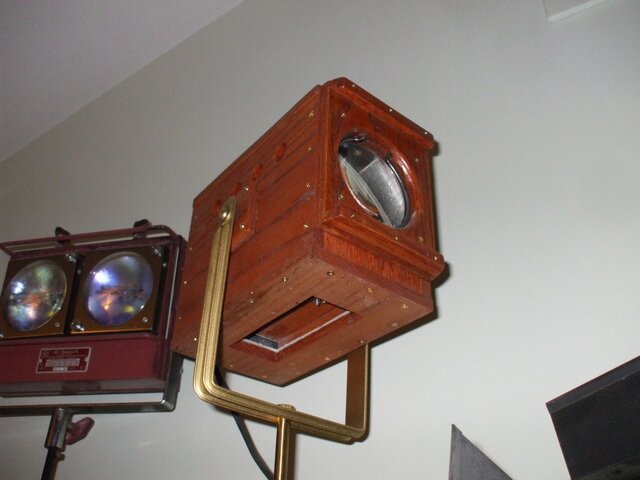
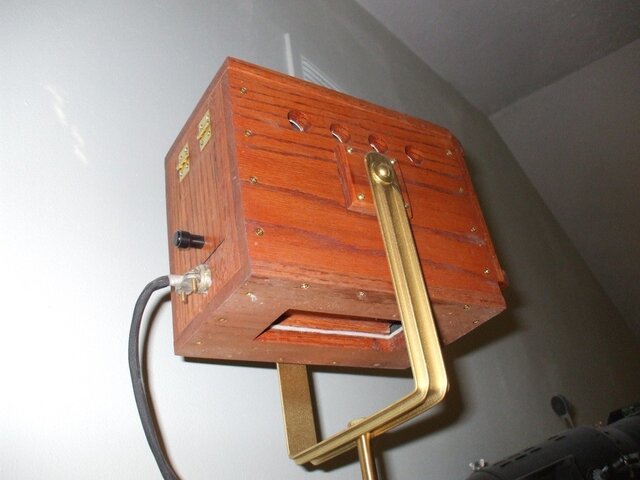
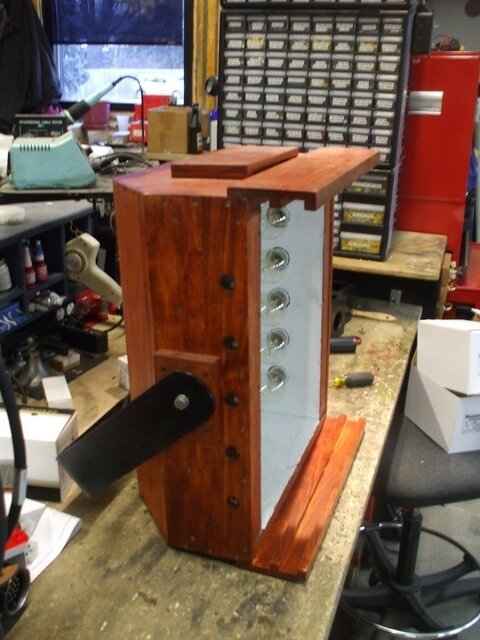
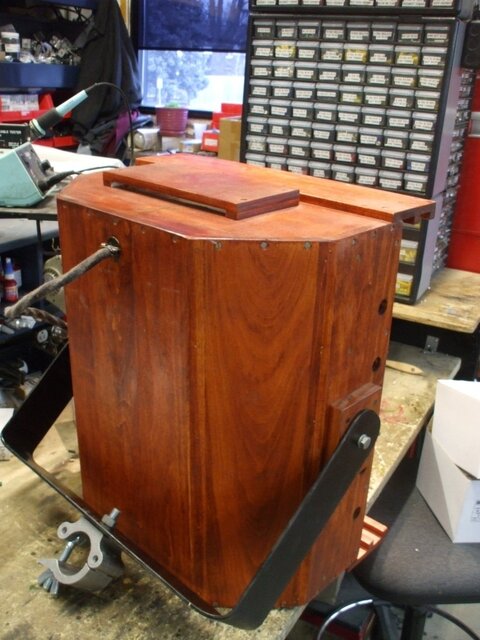
Bunch light - took the dimensions off a 1Kw large Olivalitte lamp fixture I have in making it larger in depth than this version will have been. Rounded edges and overall look is more an artistic take on it than realistic factual fixture. Same concept but in this case in following Fuch’s it was more for expiation during a tour to students purposes.

Never gonna find an actual 
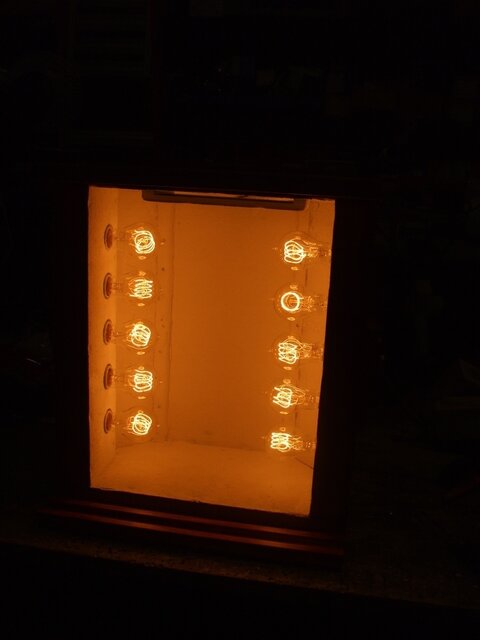
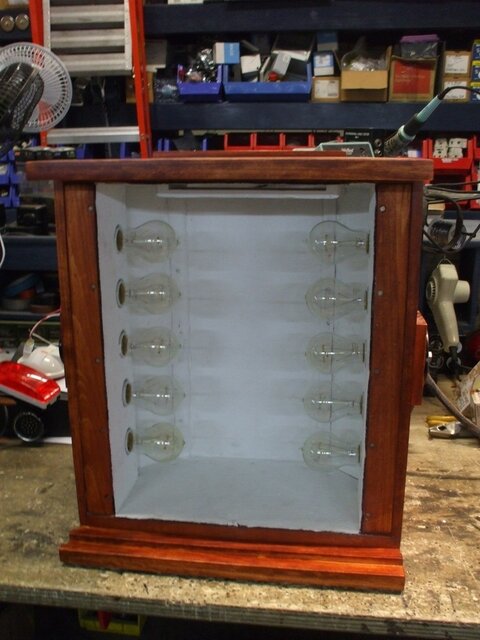
bunch light and if board at work we might make some within the specs to add to the museum - lots of versions I would like to create, more about explaining purposes for how 1910 was so important for the nitrogen gas addition to the before that 100w max wattage vacuum tube lamp. (Thus a bunch of them. Had for filament sources bunch lights, boarders, flood, spot, box spot and PC fixture to choose from back than.) Bunch lights if not by WWI, by at least WWII were I think recycled and now gone. Doubt anyone can find a real example - even if in the books. Faced with that, the “Stage Lighting” manual in how to build one = expiation and even if it wouldn’t be stained for other than display purposes, it more fits given it is now display for museum.

That was a fun project also - both on my list to build again once I get a chance. Too many old lights to restore at the moment for that chance.

On other projects, did start making a few Cyberlight 2.0 oak fixtures last year. I’m not a moving light guy and while I had color changing MR-16 source and even circuit board and mirror done... didn’t work out wall given the spring retracting solenoid I chose for the project. Still working on them and might abandon the whole inspection mirror moving mirror concept in making it at least function - still in the works. Once close to done is scaling the Cyber 2.0 graphics onto the oak fixture. Posted before about this project.

Yea.. Half coupler on it - bigger shame is out of room on a 70' pipe with other gear on stands that there at 16" on center above and below hung there is no room to hang it or a stock pile of other gear. Just added a PAR 38 above to the hang - room for it. $20.00 for a soup can Par 38 fixture that is original from the 60's in home build fixture. Even has the lumber yard sticker the yoke was bought from on it’s yoke. True antique from the 60's in prime condition. Need more room to display the gear - after that, less concerned about clamps in doing accurate where possible but in ready to go on a show and rigged for hang... I’m mostly good in presentation.

Nothing like building from scratch out of lumber - studying and figuring out the cooling vent system as Fuch’s very well lays out, and than making one. Not an easy project for students though - making it well is expert level - plus the heat shielding is very expensive.

Could learn a lot more on fixture theory in having them service call current gear, than old gear and learning the details and concepts in advancement. Also that theory bench focus once thought done. Slave labor is good thing in me at times getting people in to work on their own gear and learn from in doing so.

Splitting a 360Q down the center would be really cool - I would go fiber abrasive grinder wheel, but do show pictures. Already burned out and replaced brushes on many the Dremmel tool - at work even bought an industrial Dremmel like tool with more power due to how many I have burned out. Careful with them in often if what you want to do, a more powerful tool might do for the bulk of the work.

Good to inspire concepts in the industry - we all have a responsibility to inspire, and when board to challenge ourselves. As above with my lumber fixtures... concepts always been out there, where is your’s in stuff to do when board?
 
Last edited by a moderator:
Splitting a 360Q down the center would be really cool - I would go fiber abrasive grinder wheel, but do show pictures. Already burned out and replaced brushes on many the Dremmel tool - at work even bought an industrial Dremmel like tool with more power due to how many I have burned out. Careful with them in often if what you want to do, a more powerful tool might do for the bulk of the work.

That sounds like a go ahead! Watch this space for a 360Q cross section! My dad is a pipe fitter/welder. I bet I can coerce him in to helping me with this.

Among my projects:
-Finishing touches (sockets, shutters, cleaning) on otherwise mint brown 6x9 360Q's (5 total, one will not be cut apart! :) )

-Still needing to get started on my 6 inkies. They seem to work fine other than one missing lamp, but I'm still going to rewire them. A friend used them mounted on the lip of the apron for MacBeth. They worked very well and cast some dramatic shadows which was exactly what he wanted.

-Have about 4 x 8' sections and 2 x 5' sections of old A-lamp striplight. All roundels (plain non-spread RGBAW) are present and in perfect condition. They were designed to be continuous, so they are open-ended. I am planning on having a metal shop brake me some end caps and I will rewire them for 5 circuit with I/O pigtails. Not to mention hanging irons. Still not sure how to rid the socket terminals of the copious amount of solder helping hold the leads on (why'd they do that? I've seen this on all striplights I've serviced - why not just ring terminals?). Hopefully it doesn't render the current sockets useless. These are asbestos wired, so proper precautions will be followed.

-Around 12' of HUB R40 strips, 3 circuit. They are portable strips and need no metal work. Two are 4.5' and one is 3' so they are good, compact units. They just need a rewire and possibly some new Leviton 9885 porcelain sockets.

Lots to do to keep me busy!
 
Last edited:
Good blow torch on the old solder, protection and air blower - soldering iron won't do it. Did it because they didn't have ring terminals, it worked well and still works. Some of the screws in the socket might not be designed to get unscrewed as a further note in not attempting to over stress the screws in the terminals if not moving easily beyond a point. Worked on a few this past summer.

Dremmel good tool both for the sockets and terminals on them - don't forget to treat what ever bright work you polish up.

Finally, if enamel A-Lamp reflectors... Rust-Oleum #7881 Appliance Epoxy works really really well in touch up, but it's also really messy and sticky afterwards. Your work area is going to be a real mess after using it, but it is a great product to use.

Have fun with them - mine were like 8' long and currently at work I'm doing the more normal 6-cell Altman types with RSC lamps in feeling your pain. Swore off older cyc light styles after my last working on them. Only like 17 more to go before I can sware off cyc lights in general for a while more at least before I get back to the Colortran cyc's that are worse yet by way of aluminum construction metal fatigue. Long story and long term project. So don't like working on cyc lights.
 
Remember that if splitting apart a fixture - you don't have to split all things including the lenses. As long as you can see, not all has to be split in half. Awaiting this great thing done in perhaps seeing it work (perhaps with baffles needed) but still in seeing with say some haze the optics of the light in a way not seen before.

Perhaps as a concept to consider a little more than 1/3 cut away in doing so. Somewhere between 1/2 and 1/3 might work best for example and in seeing it in a structural way for making it work.
 
Exactly what I was thinking on the 1/3 split! I hope to pick through my storage unit this weekend. I have quite a few bell housings and lens tubes laying around, as well as some chipped lenses and partially burned reflectors I can use. I should have enough to build a pretty decent and functional demo unit!
 

Users who are viewing this thread

Back