Brick Wall

Has anyone had success with this seamless paper as a wall covering?

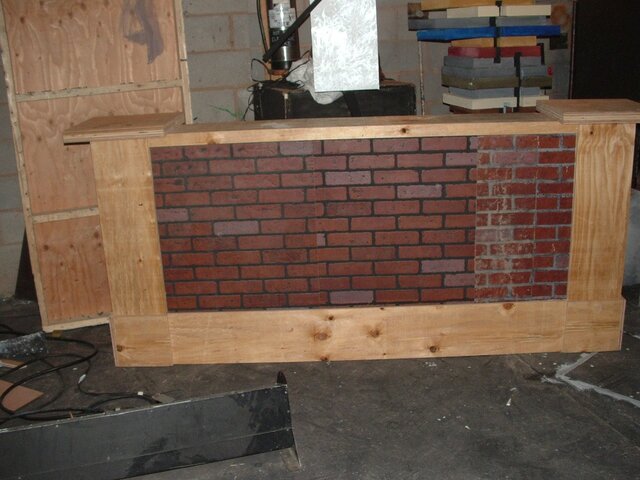
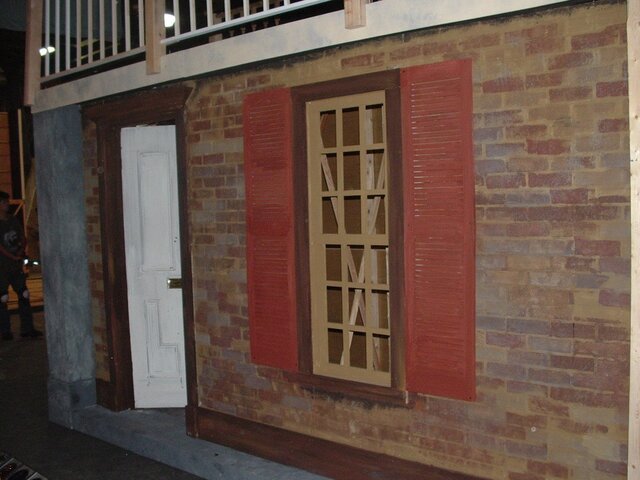
Brick Pattern Seamless Paper from Rose Brand

Our set is a two story "back wall" for Kiss Me, Kate, and we simply don't have the time to paint the entire set and make it look good enough. Since it's 84" wide i was thinking that this might be a better option, stapled to the flats.

Comments would be greatly appreciated! ;)
 
It is too photorealistic for my taste. I would suggest painting your wall a base tone and then just suggesting the idea of random bricks. (Using a rectangular sponge is an easy and fast way to do this).
 
Yeah, that was my only worry. Since it includes the shading of the bricks, etc. it might look a little weird.

As far as painting the bricks... Paint the base, tape the grout lines, paint the red then sponge on the additional colors? Does that produce the best look?
 
A brick wall with clean lines won't look right. Best thing to do is to cut a sponge in the shape of a brick and using the sponge and a level go at it. Do a course, put up the level, draw a pencil line, do another course....

There is also a product that is known as "brickenite" or "Z-Brick" that most lumber yards either carry or can get for you. Last I remember its under 20 a sheet. Its pre-painted brick looking masonite. It does need a big of paint help to look like real brick, but it works and is nice and fast. It also takes light like real brick. We used it last season for out backstage part of Kate and it worked pretty well.
 
There is also a product that is known as "brickenite" or "Z-Brick" that most lumber yards either carry or can get for you. Last I remember its under 20 a sheet. Its pre-painted brick looking masonite. It does need a big of paint help to look like real brick, but it works and is nice and fast. It also takes light like real brick. We used it last season for out backstage part of Kate and it worked pretty well.
I've also heard it called 'gaslite' or something like that, but I've heard it's getting harder to find. Never had to purchase it myself.

Attached are a couple pics, one unpainted (the low wall section) and one painted (the side of the house). We were piecing scraps together for this project (which entailed much head scratching and cursing to get the mortar to line up) because the TD couldn't source any more in time. The stuff you see with the black mortar is as it comes from the factory, some of it had the mortar repainted gray as you can see. Eventually it all was painted the same as the side of the house.
 

Attachments

  • DSCF0037.JPG
    DSCF0037.JPG
    217.8 KB · Views: 3,360
  • DSCF0036.JPG
    DSCF0036.JPG
    197.5 KB · Views: 852
Not going to help the OP, but it's a good place to share the latest trick I learned for making brick. I took my tech class on a backstage tour of our big regional theater last week. The set was huge, amazing, and had a LOT of brick on it. Their trick: Sound deadening board. That 1/2" thick fuzzy stuff in the plywood aisle at Lowes/Home Depot. It's designed to be put into walls to keep it quiet between rooms. They run it through the table saw to cut brick shapes. Then they take a knife and split it into two pieces... the act of splitting leaves an awesome rough texture PERFECT for old brick. Glue it in place and paint. It's time consuming, due to the painting and gluing process, but inexpensive and looks amazing.
 
I like to use 1/2" blue board (blue insulation board), use a router to drop in grout lines and use a sponge dipped in paint thinner to texture, paint it with flex coat and it can be repainted and used over and over.
 
Not going to help the OP, but it's a good place to share the latest trick I learned for making brick. I took my tech class on a backstage tour of our big regional theater last week. The set was huge, amazing, and had a LOT of brick on it. Their trick: Sound deadening board. That 1/2" thick fuzzy stuff in the plywood aisle at Lowes/Home Depot. It's designed to be put into walls to keep it quiet between rooms. They run it through the table saw to cut brick shapes. Then they take a knife and split it into two pieces... the act of splitting leaves an awesome rough texture PERFECT for old brick. Glue it in place and paint. It's time consuming, due to the painting and gluing process, but inexpensive and looks amazing.

I have done that with homasote before. One trick is pain the bricks before you put them on...

Anytime you are dealing with brick and can get any type of 3D element on it, do. Vacuformed brick walls are fantastic if you can go that way. Nothing gives a brick wall more life the lighting it to give it depth.
 
I like vacuform for brick can be a little price at about $110 a sheet for a roughly 4'x12' but it does look great. Our christmas carol set was done with fiberglass brick sheets looks great but heavy.
 
I get good results building up a faux-brick wall with texture paint. Apply a base coat tinted for the grout. Tape the grout lines and apply the first coat of texture paint with a roller. Peel the tape and apply subsequent coats with a sponge or spatula, changing the pigment for each layer.
 
Well, after speaking to our director/drama booster coordinator today I found out we're already over budget ;)

So, it looks like we'll be painting the walls gray speckled with black dots, taping out the bricks, and then sponging on the different colors of brick.

Not my first choice, but unfortunately it looks like we won't have any depth to this. I'll put up some pics after it's done.

Thanks for the responses everyone!
 
Our Resident Scenic Designer, Jeff Seats, has an excellent technicque for painted brick or rock surfaces. He cuts a couple of 2'X2' pieces of luan or 1/4" plywood. Then adheres foam rubber or sponges < depending on the size and shape of the bricks / rocks> in a pattern on one side of the luan. Lets's say you do a lay out of three bricks long by 3 high, and the center and top course are offset by half a width.
You base the floor or wall with the grout color then, using two or three different paint-colors you just "stamp out" your design. it works well on floor and walls. If you get off in your paterning it still looks pretty good as it just makes the edges of everything a little blurry.
 
as odd as this sounds, the last thing you want to do with a brick wall is tape the grout lines. Real brick walls, especially old ones, have rough lines. Also, the grout is usually mostly gone or badly damaged.

Look at the stamp option and don't fret about the bricks being perfect. Also, after you get it all done you might want to hit it with a glaze or two.
 
Another big theater here in town has this larger rolling drum around 3 ' in diameter. It has a stationary handle... sort of like the hand held rolling devices things you use to pack down dirt when doing landscaping on construction. Well they have one of these but around the drum they wrap these large foam rubber stamps of brick and other textures. They say it's not exactly perfect but a great way to do the initial layer of brick, which they touch up later with other hand layers.
 
You can also cut a section of brick stencil out of a piece of poster board. Then paint the back wall a mortar color, then use a sponge to add on your bricks. move your stencil as needed, and vary the color. to make it look 3d, you can take a straightedge and add highlight and shadow to some but not all of the bricks. spatter some mossy colors on to make it look older. A bit time consuming, but probably a bit faster than a brick shaped sponge and a level. also fairly idiot proof, as you can probably get even the slowest kid on the crew happily making a brick pattern for hours. Just show them how to make sure it lines up. At a distance, you can probably convince people that the bricks are 3d by using highlight and shadow to your advantage. Just think about how they will be lit, and dont violate it too hard core with the lights, and it will look really good.
 
Our high school just finished a show where we used stone. We took inch thick insulation boards drew out a mock brick pattern on it with a sharpie. then used old spray paint and sprayed on those lines. the spray paint "eats away" at the foam leaving a nice texture. We then made the grooves deeper with just a file. then taking burlap, dump it in plaster and then lay it on the Styrofoam making sure you push it into the gaps you made earlier. This plaster burlap technique made it much easier to paint, which was just painted gray then sponged on different stone colors to give it that grainy look. the burlap also adds lots of texture to it making it look like stone.
 
used old spray paint and sprayed on those lines. the spray paint "eats away" at the foam leaving a nice texture.

I hope you were doing this in a well-ventilated room, as the chemical reaction between the foam and the solvents in the spray paint releases some rather nasty gases, including a couple forms of chlorine. I'd advise you to make sure you have the proper types of respirators before using the technique again.

I've seen and done a similar process with luan stencils and heat guns/propane torches, but applying heat to foam is just as bad environmentally, if not worse, plus offering the chance to burn the shop down.
 
I use that same thick foam but instead of dissolving it just get a few stiff metal bristle brushes and carve away. Some pictures of process and results. P.S. Makes a huge mess, they're still finding bits of foam in that theater. P.P.S. just noticed that guy on the ladder is barefoot... I'm going to go with I was at lunch when these were taken.


Users who are viewing this thread

Back