Speaker wire through conduit

KBToys82

Active Member
So at my school, currently I have my mixer and sound inputs on one side of the room with the amplifier for the speakers in a closet on the other side of the room with the wires hanging all over anything on the wall to keep it upright (clock, speaker stands, etc.). Then, from their the speaker wire comes back out of the closet and heads to the speakers.

My concern is when the state does their inspection and sees hanging wires that they won't be happy, plus its pretty inconvenient to have to go back and forth to the closet to turn on and off the amplifier.


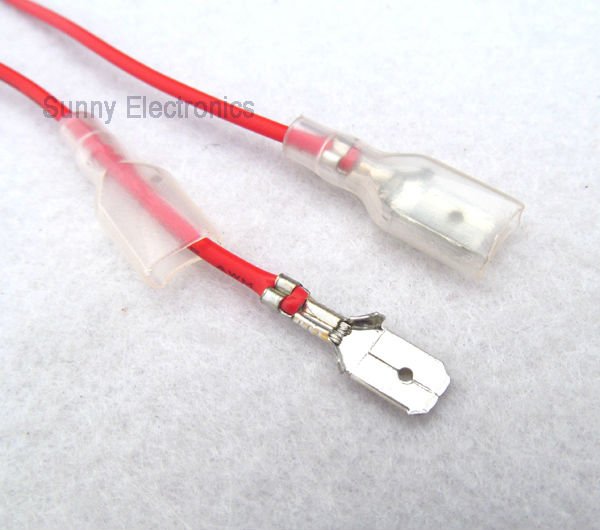
What I'd like to do to clean this up as well as even be able to lock up my future sound rack is take the current speaker wire and run it through conduit. The speaker terminals just have the bare wire going into them with the little black/red clips that lock them in place. What I would be doing is coming out of the amplifier using 2 TS cables, plugging them into a dual 1/4" TS Mono Jack Wall plate like below and hook the conduit speaker wire up to the wall plate.


This would also enable me to use the movable rack that I am getting and lock it up at night with only having to plug the power cord and 2 speaker cables up each morning.

Is this possible? Below is the wall plate I'm looking to get:

http://www.seismicaudiospeakers.com...7&cadevice=c&gclid=CKK3t5WgxMgCFUERHwodKRwAGA


Also, I guess they only have locking wall plates with TRS connections and not TS?
 
Yes, I would definitely prefer a better connector for the wall plate like speakon, but since I'm not the most electric minded person, I wasn't sure if that was possible.


Thank you for the suggestion!
 
Speakons are great, but total overkill for this. It isn't as though these will be mated and un-mated thousands of times. 1/4" phone plugs have proven themselves to be just fine for speakers.
 
Speakons are great, but total overkill for this. It isn't as though these will be mated and un-mated thousands of times. 1/4" phone plugs have proven themselves to be just fine for speakers.

A Speakon is $4 and it is light years ahead of a 1/4" TS connector. They don't pop when being plugged in and unplugged, they're more rugged, they're locking, and they're the industry standard. You also can't plug a 24 GA guitar cable into your amplifier when you use Speakons, which I have seen more often than I would like to. I would go as far as to say that there is no reason to use a 1/4" connector for loudspeaker level connections in the 21st century.

Taking a look at the backside of that plate I don't think it will even hold up to any heavy use - forget thousands times being plugged and unplugged. I would also recommend the Whirlwind plate. A speakon is quite a bit easier to assemble than a TS connector and uses screws, so you won't need to do any soldering.
 
I do think Wiremold would work best and I think with the amount of times I may have to unplug and plug back in, SpeakON is probably the best option. Now I just have to hope they will do this.
 
Building a little "Y" combiner adapter would be a trivial task, and allow you to combine L and R into a single cable going to the wall jack. I wouldn't be surprised if such adapters are commercially available too.

I also agree with the Wiremold suggestion. I've done several installations using the NMW1 series, which can look pretty clean and sharp, or blend in almost "seamlessley", with some quality workmanship.

To quote from an installation guide I wrote some years ago:


The NMW1 conduits have convenient dimensions; each piece is 1524 millimetres long, which matches 60 inches (exactly). This is convenient for buildings in North America, which unfortunately are almost always designed to inch-dimensions. In metric, however, this 1524 mm divides very easily and very well for measuring where to place the mounting screws! I advise you ignore the instructions that come with the NMW1 conduits, and follow this scheme instead:
Fasten the conduit (back piece) to the wall, with the two outer screws each 12 mm from the ends. Then use either 2 more screws (4 total) to divide the 1500 mm span into three 500 mm segments, or 3 more screws (5 total) to divide the 1500 mm span into four 375 mm segments. (If you prefer to work with inches, put the outer screws 3/4 inch from the ends, then use 2 more screws (4 total) to divide the 58+1/2 inch span into three 19+1/2 inch segments. Or place the outer screws 1/2 inch from the ends, then use 3 more screws (5 total) to divide the 59 inch span into four 14+3/4 inch segments. Though using the metric scheme keeps the conduit ends a little better aligned, and I think you will find the integer millimetre math easier than the fractional inches math too!)

To maximize clearance inside the conduit (ensuring wires are not pinched, and wires that are tightly packed do not risk popping off the conduit covers), I recommend using bevel-head screws and drilling holes through the conduit back pieces with a matching countersink bit. If you do not countersink the mounting screws, use pan-head screws with low-profile heads.

Regarding end alignment, you can use NMW1 end-to-end couplers for long spans of conduit, but if you're careful and precise with your trimming and mounting, you can create a span of indefinite length without any unsightly couplers! To do this, first mount the back pieces of the conduit to the wall at their full original/untrimmed length, keeping the ends carefully aligned. Only trim the last piece at the end of the span. After all the back pieces have been mounted, lay the cables and snap on the front covers, starting from the end of the span with the trimmed conduit back piece. But do not start by snapping on a trimmed cover -- start by snapping on the original/untrimmed full-length covers! This will offset the seam of the back pieces from the seam of the covers, keeping them perfectly aligned and making the seam nearly invisible!

If you're very careful and precise with your trimming and mounting, you can even create inner and outer corners from the straight NMW1 conduits, no bulging corner joints necessary! This requires leaving some gap between the ends of the back pieces to round the corner, and trimming the front covers with a cut at half the angle of the corner. (eg. Cut at 45 degrees if the corner is 90 degrees.) For an inner corner, a 4 cm gap between the ends of the back pieces (2 cm from each conduit end to the corner) is usually sufficient. For an outer corner, a 2 cm gap (1 cm from each conduit end to the corner) is usually sufficient. (The gap gives extra clearance inside the conduit, allowing the wires to bend around the corner without putting a sharp kink in them.) Naturally, the front covers will be longer than the back pieces; ensure the covers are cut precisely to the required length! (For an inner corner, the back edges of the cover's rail clips must reach within 1 or 2 mm into the corner, with the front surface of the cover a few millimetres shorter due to the angled cut. For an outer corner, the back edges of the cover's rail clips must span the full length to 1 or 2 mm past the corner, with the front surface of the cover extending even further by a few more millimetres due to the angled cut.)

Similarly, flat corners without corner joints can be made from straight NMW1 conduits too by trimming the back pieces to leave a gap around the corner, and trimming the front covers to extend past the end of the back pieces and meet at a half-angle seam. A gap of approximately 2 cm between the ends of the conduit back pieces at the the inner-radius rails (1 cm from each conduit end to the "corner seam") is usually sufficient. (The gap is necessary to allow the inner-radius wires to bend around the corner without putting a sharp kink in them.)
 
UPDATE

So they just installed the conduit today, I went out and bought 60 ft of 14/2 Speaker cable. Purchased speakon wall plate very similar to this one http://www.sweetwater.com/store/detail/WP1009 and have a question that I'm sure the electrician knows, but want to know just in case so he can install it ASAP.

Does the wire have to be soldered on to the wall plate? I had watched a lot of videos about installing speakon cables and of course all of them were the cables themselves and not this connector so I was expecting to be able to screw the wires into the socket.


Thanks everyone! This is going to make my life so much easier. Now if only my amp wasn't so noisy.
 
Does the wire have to be soldered on to the wall plate?
Nope.

Use the proper solderless crimp terminal:
Chassis: flat tabs for FASTON 0.187" x 0.02" (4.8 mm x 0.5 mm)

proxy.php
 
It is a solderless quick disconnect tab. you do need to get the right size but it should easily be found at a big box hardware, and you will need a crimper.
 
Ok, then in that case I'm not sure what to get. First, mine is a double gang going inside a junction box. Is that going to be able to hold the disconnect tab. Also, even though mine comes with NL4 connectors, I'm only using 1+ and 1-. Thanks for helping me out.
 
Same as whateveryone else said; from those photos, it looks like they are spade connectors.

You could probably solder the wire directly to the jack terminals if you want. But if you want the jack to be easily removable, attach female spade connectors to the wire (and then slip those onto the jack's terminals).

But to be the black sheep, I recommend you still solder the wire to the spade connectors after you finish crimping them on.
Get a connector like this:

proxy.php

...where the insulator sleeve can be completely slipped back, and then you can easily add a dash of solder across the wire ends (after crimping, of course!), and then slip the insulator sleeve over the whole thing.
As a bonus, because those connector's insulator sleeves cover the whole thing, there's less risk of short circuit if someone's monkeying around in the box while the amplifier is live.
 
I recommend you still solder the wire to the spade connectors after you finish crimping them on.
What is the purpose of doing that? Doesn't that pretty much defeat the purpose of using a crimping spade connector; ie: not having to solder? If you are going to get the soldering iron out anyway, why not just skip the crimping and solder straight to the terminal for a more solid connection?
As a bonus, because those connector's insulator sleeves cover the whole thing, there's less risk of short circuit if someone's monkeying around in the box while the amplifier is live.
Since there's no point in soldering the wires after they've been crimped, why not just buy insulated terminals? Easier than using one with a sleeve that is difficult to slide on properly and has a tendency to slide back off.
 
Electrician came in before I ever got to school on Monday and placed the wire through the conduit he put in place on Friday. I'm guessing he probably just crimped the wire and he's pretty good at his job. No connection issues, am able to lock the connectors in place with the Speakon cables (Thank you Lextech for that suggestion!)

Then the big wigs at the school came in later yesterday with the thoughts of redoing the choir, band and auditorium and asked me my thoughts. Talk about a loaded question.

Thanks everyone!
 
If you are going to get the soldering iron out anyway, why not just skip the crimping and solder straight to the terminal for a more solid connection?
There is a place for soldering to a quick connect rather than direct to the terminal.
There are some applications where one has to presume upon abuse of the connectors, school halls, public facilities, certain parts of universities, patch panels, etc etc.
Here a soldered spade makes sense, it saves needing an iron when the Speakon gets destroyed by some idiot who doesn't know how to use them and destroys the connector.

But for the most part, I'd direct solder anyway because that can't fall off the terminal during vibration...
 

Users who are viewing this thread

Back