Floor Mounts

MNicolai

Well-Known Member
ETCP Certified Technicians
Fight Leukemia
I just made 8 floor mounts, and all they are is 12"x12" 3/4" plywood, with two 3/4" rises on each side to elevate the bottom of it. Then there's a hole in the center for the bolt to connect through the yoke of a light. Works beautifully. I'm just curious of how common of a practice this is, and if anyone has other simple, yet very useful homemade concoctions for lighting gear?

proxy.php
 
Last edited:
Used to have a gigantic bin of those at the production house I worked at. Paint ' em black, carpet them, they're workhorses and last forever.
 
I didn't carpet them, but I did paint them black. I was surprised, because I'd previously only used them on S4 PAR's, Strand 1kw fresnels, and Strand SL's. If was a bit concerned that a S4 might tip one over, considering that a S4 is a bit heavier and has a different balance to it than an SL, but after testing it out today, the S4's hang on without a problem at all, and the center of gravity is perfect. It's a shame I only had the spare lumber lieing around to make only 8 of them.

While doing that though, I'm also making a dolly for my filing cabinet of gels to roll around on.
 
Your floor mounts are great, MNicolai. I've built many exactly as you've described. Another option is to use mic stand bases, but the noise boys tend to go all 2k over that!:p

My newest/favorite "garage-built" tool is this one. (Currently unavailable from roadietools.com)
proxy.php
proxy.php

I bought a 15/16" socket, the cheapest I could find (it looks as though the original was made from a spark plug socket) at Harbor Freight and cut two grooves in it with an angle grinder. Normally wing nuts on half-couplers need only be finger tight, but occasionally, such as when hanging conventional fixtures (8-Lites) roostered out with yoke parallel to floor, a little more leverage is needed, and adj. wrenches muck up the ears and the threads.
 
Yup, got a bunch of these.

We left them bare wood - easier to see on a black dance floor (and they are primarily used as dance shins), not that the dancers aren't going to kick them anyway.

I did retro all of them last year with new bolts, nuts, flat and locking washers. The locking washers let the unit stay tight, then we simply pivot the whole base, then L spike the floor on opposite corners.

I also once purchased a bunch of the round floor plates Altman sells, hated them, built more out of wood.

Which reminds me I have to post some pic's and drawings of our new steel dance towers.

Steve Bailey
Brooklyn College
 
...Which reminds me I have to post some pic's and drawings of our new steel dance towers.
Yes, please! (Love sidelight towers.) The PA sidelight towers were among the best, of many, contributions by Production Arts Lighting to the stage lighting industry.:grin:
 
I just made 8 floor mounts, and all they are is 12"x12" 3/4" plywood, with two 3/4" rises on each side to elevate the bottom of it. Then there's a hole in the center for the bolt to connect through the yoke of a light. Works beautifully. I'm just curious of how common of a practice this is, and if anyone has other simple, yet very useful homemade concoctions for lighting gear?

Build them as you did, but use Tee-nuts with teeth.
(McMaster part #90975A033)

This keeps you from having to use two wrenches to tighten the unit down.

--Sean
 
AGREED -- use the McMaster part -- totally worthwhile. I can't tell you how many times I've been pissed off at having to use two wrenches and then ending up with the fixture in my lap on the floor looking like an idiot. Also, that part uses the same standard bolt on a Tee or C-Clamp so its all the same in the end. Go Sean!

The theater I'm working in currently has all their bases made that way -- we've got a terrific shop and they deserve all the credit. Thanks Bard Summerscape Shop Crew!!!!
 
Thanks for the heads up on that. I just put that part on order.
 
That just how mine are made. Dont really get the carpet thing mentioned by someone here. We have over 25 they work great and will last for ever.
 
Build them as you did, but use Tee-nuts with teeth.
(McMaster part #90975A033)

This keeps you from having to use two wrenches to tighten the unit down.

--Sean

Tried T-Nuts. They failed over time (note that some of my bases have been in use for 25 years or more). Seems the 4 little points don't like the constant tighten/loosening and WILL eventually stop engaging the wood.

Thus we went to 2 nuts and simply over-tighten it all and rotate the entire base to focus, then spike it.

Not to say you won't have better luck, just my own experiences,

Steve B.

By that point I make new floor plates.... There's always scrap around from the scene shop guys.

--Sean
 
Really low-down trick, but it works: you know those bricks that came with your counterweight system that you use (probably as a firecode violation) to hold open doors? Clamp the fixture directly to them. Set on floor. Enough of this taking-off/putting-on of C-clamps. Waste of labor.
proxy.php

 
You're showing a fixture with a double yoke: specifically designed for floor mounting with no other accessories needed, on a base? How redundant, again!:p Also, since they're aluminum fixtures, why not a chrome base?
proxy.php

aka, dinner plate covers, about $6 each from your local restaurant supply house. (Apparently all the rage in the Orlando area.)
 
If you don't have weights but can weld, take some 2" OD pipe and weld it into an H shape, with the cross piece above the two vertical pieces. It'll raise the cross piece 2" off the floor, then you can put your clamp on the cross piece. Trouble is, they are heavy.

I've also seen people use i-beams for this, cut to about 6" long.

FPLogistics sells a metal base with a post that fits. Can't remember how much they cost.

I use wood. 5/8" ply with a tee-nut countersunk in the wood. I make them 8" square, no feet. I never calculated the cost of them, but I'm guessing about $2.00 each, including paint.

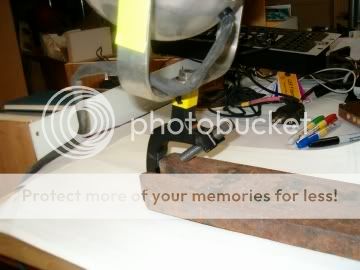
The other issue with a floor base if you're using an LED is the data cables. On some units the bracket doesn't allow much clearance past it for the dmx connections. So I took some 2" plumbing nipples at about $1.50 each and a longer bolt. You could do the same thing by cutting a piece of conduit to length or something. The ones in Bill's pix don't seem to have that problem. Unfortunately, the ones I own do.

As for clamping, etc., my LED pars get used 99% of the time for uplighting, so they sit in the case with the base on them. On site it's just a matter of cable.
 
Last edited:
Yes, the fixtures shown do have a split yoke, BUT, when spread for use as a floor stand one would be forced to use 90 degree DMX cables as there is not enough clearance for standard XLRs.
 
Gee, such fun. I generally make "H" shaped mounts using 2X4 and C-clamp the instrument to it. Two parellel 2X4's with a cross bar over the top, so it looks like an "H", I think everthing is about 12" long or so, depending on what I am mounting on it. A center hole can be used to bolt a light to it.

Every body remember where the name "shin buster" comes from. Ouch.
 
Last edited:
I was taught to put the bolt through the yoke in the opposite orientation from most (all?) pictured. Right now, you guys can't tighten/loosen the bolt without being underneath the base.
 
Depends. For mine, you would need a wrench on the bottom for the bolt, and then a wrench on the top for the nut. That's soon to be solved when my locking T-nuts arrive.
 

Users who are viewing this thread

Back